Flatsome is a hugely popular multipurpose WooCommerce theme that lets you create any kind of online store. In just a few steps, you can easily connect your Flatsome-powered store to Robot Ninja for easy checkout testing.
What is Robot Ninja? It’s a checkout testing tool for WooCommerce. When you link your store to Robot Ninja, it runs through a series of tests to make sure your store is running smoothly. If it runs into any issues, such as a broken checkout or pages not loading properly, you get an email notification letting you know so you can quickly fix your store.
Robot Ninja takes the stress out of running a store – you never have to worry about whether your checkout is working because Robot Ninja keeps an eye on it for you.
Let’s take a look at how you can connect your Flatsome-powered store to Robot Ninja.
What is Flatsome?

Flatsome is a multipurpose theme developed by the folks at UX Themes and it’s been built especially for WooCommerce sites.
There are a lot of reasons why store owners love using Flatsome:
- Build anything. Flatsome comes with a live page builder
- Unlimited options. You can customize anything with the included live theme options
- Optimized for speed
- Beautiful designs. There are 300+ predefined layouts and sections
- Mobile-optimized design
- Drag and drop image grid
- Built-in live search
- Automatic theme updates
- It’s the #1 best-selling WooCommerce theme on ThemeForest
Getting Started with Robot Ninja and Flatsome
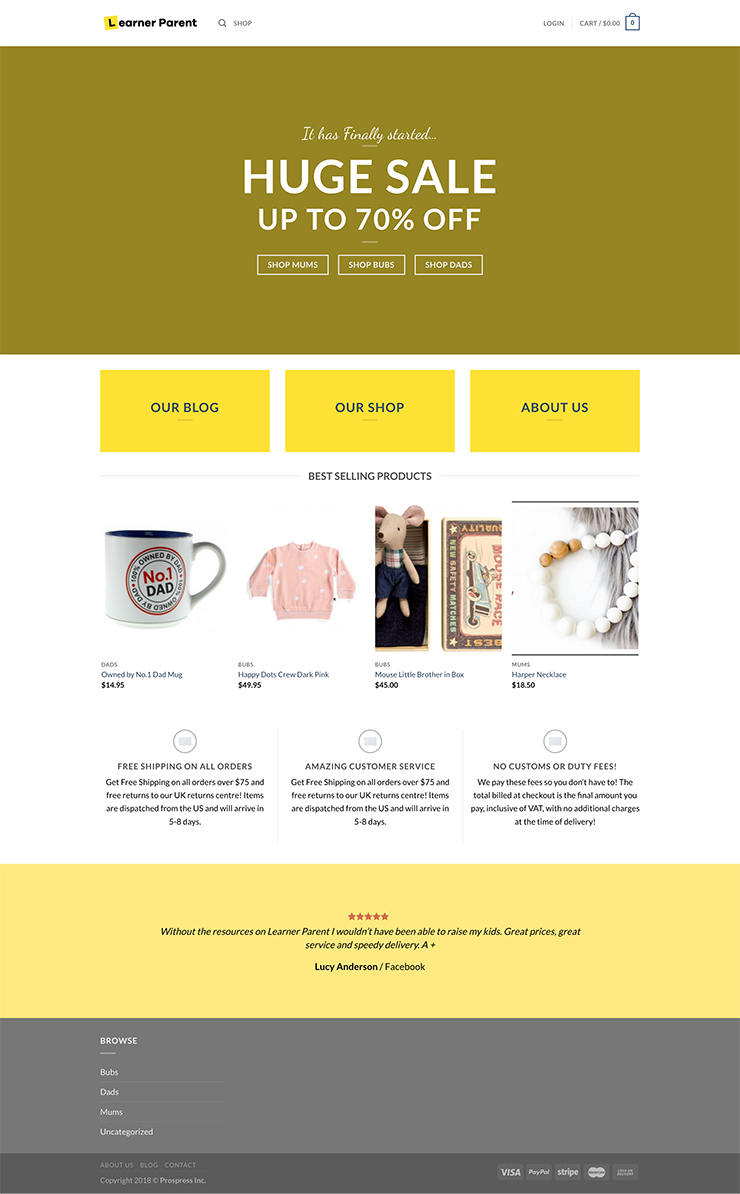
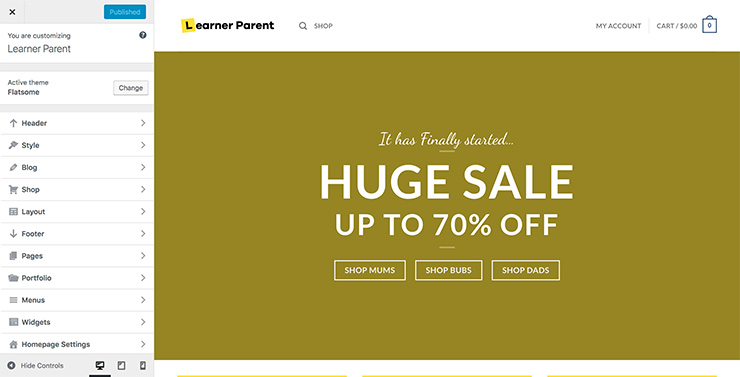
For this tutorial, I’ll be using my demo website at learnerparent.com, which is using the Flatsome theme and WooCommerce.
In a past life, my wife and I had grand plans of running a parenting-focussed blog and/or combining it with an online store or subscription service. Suffice to say, once we had kids we lost any spare time we had and thus time to work on a new business venture.
So what better use for the domain than a demo site?
I’ve done some very basic configuration and customizations to the site (nothing out of the ordinary!) and also added some test products.
Connecting Your Flatsome Store to Robot Ninja
We call the process of connecting a store to Robot Ninja “Adding a New Store.”
On the Free plan, you can add a single store to your Robot Ninja account. On the Standard plan, you can add as many new stores as you want, and you pay a subscription per store.
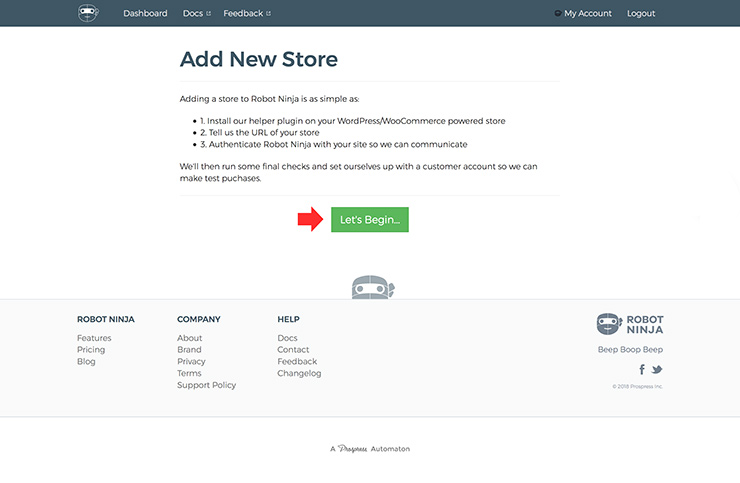
The first time you log into Robot Ninja, you’ll be greeted with a screen asking you to add a new store along with a rundown of the next steps:
- 1. Install our helper plugin on your WordPress/WooCommerce powered store
- 2. Tell us the URL of your store so we can run some checks to make sure Robot Ninja can communicate properly with your store
- 3. Authenticate Robot Ninja with your site so it can communicate via the WooCommerce REST API
To add your store, click the big green “Let’s Begin…” button.
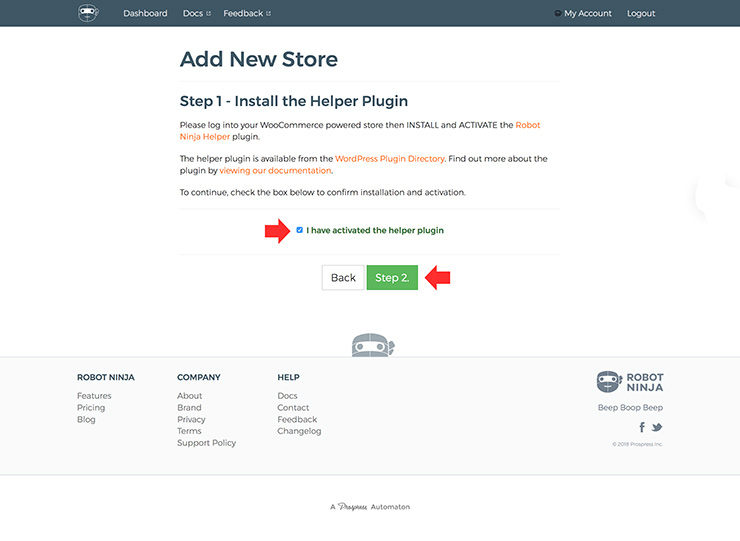
Step 1. Install the Helper Plugin
In order to make the most out of Robot Ninja, you need to install our Helper Plugin.
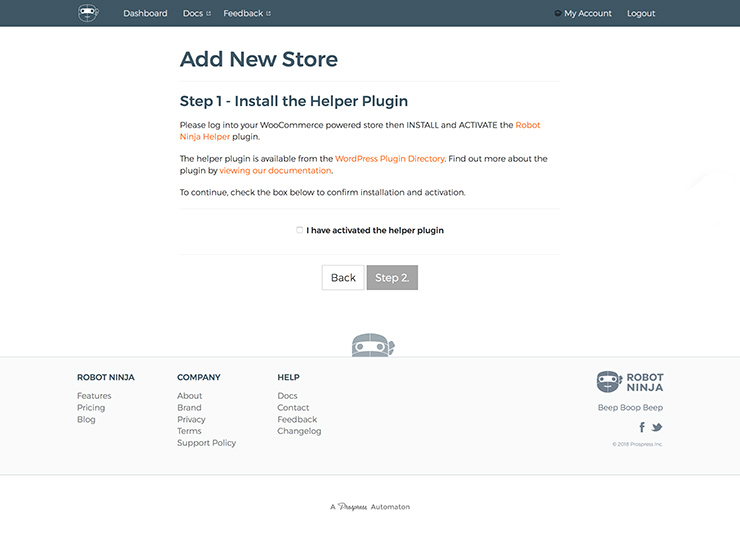
The plugin is available to download for free from the WordPress Plugin Directory and the easiest method to install it is through your site’s WordPress dashboard.

To do this, login to your WordPress site (I recommend using a new browser tab or window to do this so that you can leave the Robot Ninja site open). Go to Plugins > Add New and search for “Robot Ninja.” The Robot Ninja Helper plugin should appear as the first result.
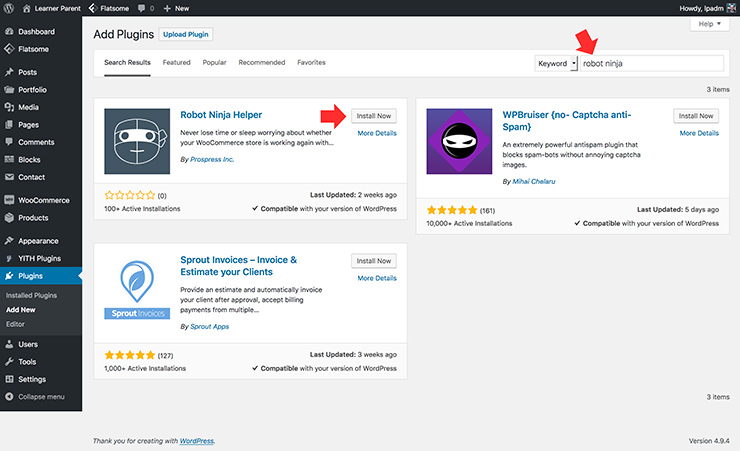
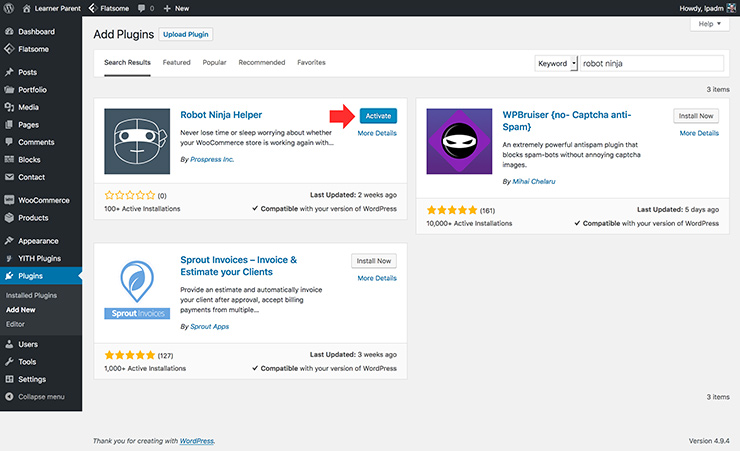
Click “Install Now” and then activate the plugin.
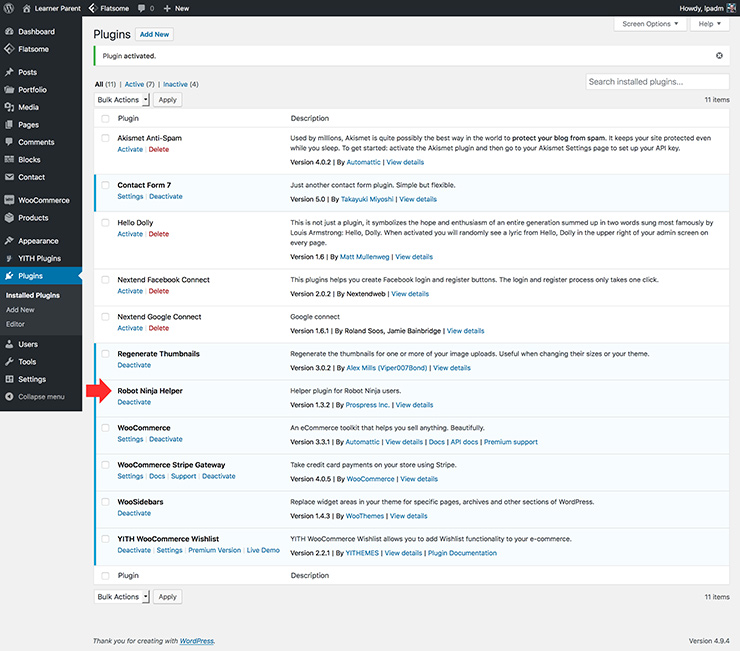
Once successfully installed, you will be directed to the Plugins screen and Robot Ninja will be listed as “Active.”
Switch back to your browser tab with the Robot Ninja website open and check the field titled “I have activated the helper plugin”. The text should turn green and the “Step 2” button will become active and also green. Click the “Step 2.” button.
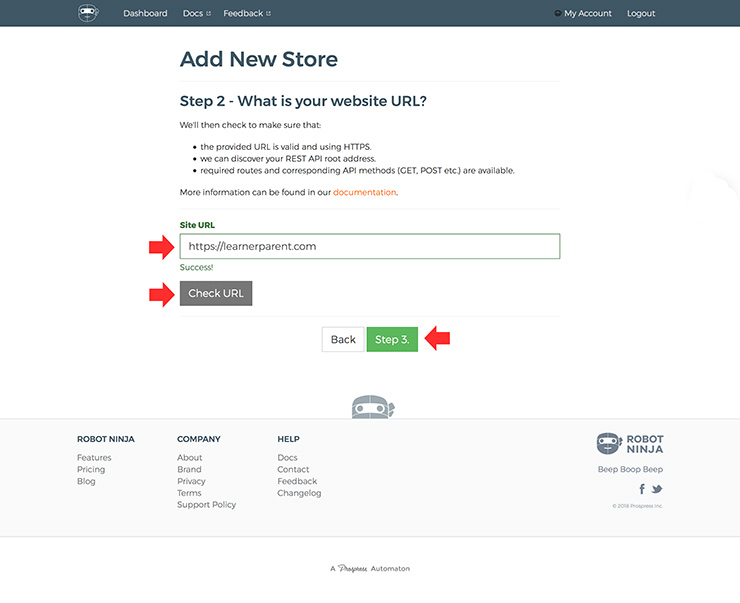
Step 2. What is Your Website URL?
The next step is to enter the URL for the store you would like to connect to Robot Ninja.
This is the publicly accessible URL for your site. In the case of my demo site, the URL is https://learnerparent.com.
Once you’ve entered a valid domain, click the “Check URL” button. Robot Ninja will then do some initial test to make sure it can connect to your site.
What exactly does Robot Ninja check for at this step? A few things:
- That the provided URL is valid and over HTTPS (The WooCommerce REST API requires HTTPS for basic authentication).
- That we can discover the REST API root address. This serves as a check that Robot Ninja can connect to your site, that you have the REST API enabled (released as part of WordPress 4.7), and how we should access it.
- That all required routes and corresponding API methods (GET, POST etc.) are available. This serves as a check that you have WooCommerce 3.x and the Robot Ninja Helper plugin installed.
If all is well, you will receive a “Success!” message and the “Step 3” button will turn green. Click it to proceed.
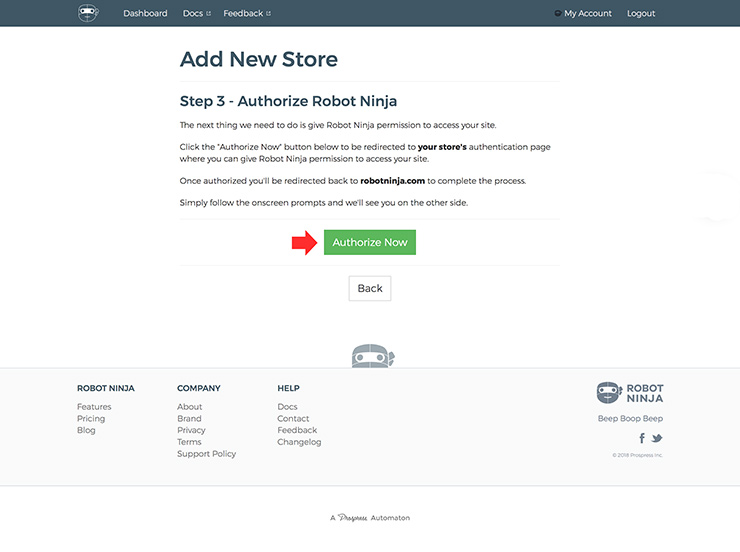
Step 3. Authorize Robot Ninja
The third and final step is to allow Robot Ninja to access your site.
To do this securely, we use the Application Authentication Endpoint that is already available within WooCommerce. You can learn more about the technical aspects of this process here.
To begin the authentication process, click the green “Authorize Now” button. You will be redirected to your site’s Authentication Endpoint.
If you are not already logged into your site you will be asked to log in.
Once logged in, you will be presented with a screen asking to “Authorize” or “Deny” access to Robot Ninja.
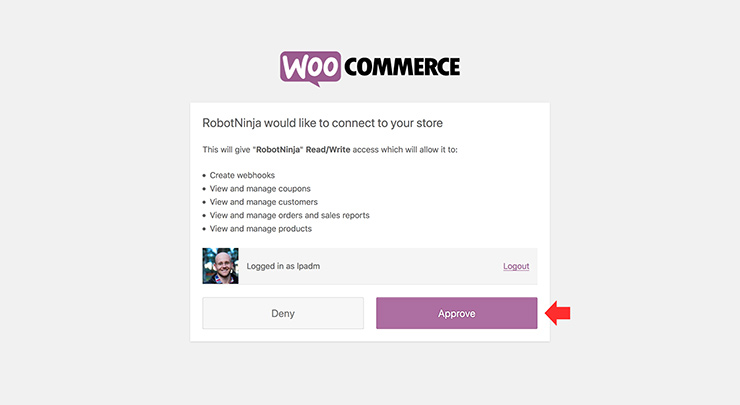
Clicking “Deny” will redirect you back to Robot Ninja, and it will not have access to your site.
Clicking “Authorize” will redirect you back to Robot Ninja, it will have access to your site.
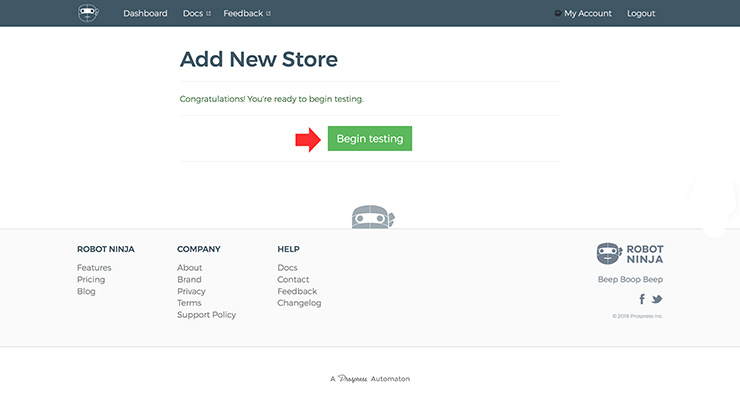
If all goes well you will be presented with a “Congratulations!” message. Click the green “Begin Testing” button to proceed.
Your First Test Batch
Once you’ve successfully added a store, you will be redirected to the Robot Ninja dashboard.
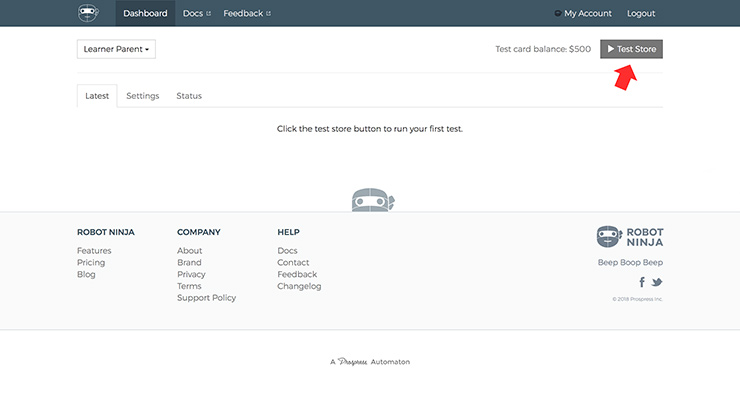
At this stage, you should be ready to run your first test. As indicated on the screen, click the “Test Store” button to run your first test.
The tests will process one by one and at the end of the batch you’ll be able to see individual pass/fail messages for each test as well the overall status.
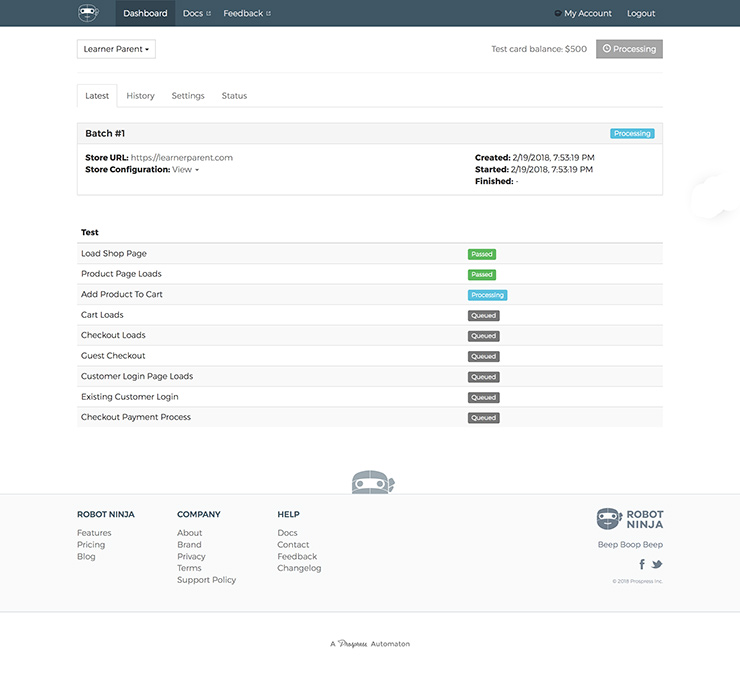
Depending on your store configurations and customizations, these initial tests may pass or fail. If you get any failures at this very early stage, the issue is likely to be do with compatibility on our end. Please open a support ticket with us and we’ll happy to help you out!
Where to Next?
From here I’d recommend exploring some of the other tabs available in Robot Ninja:
- History – A record of your test results.
- Settings – Options available to customize your Robot Ninja experience, including the ability to schedule recurring automated tests or define custom selectors.
- Status – a quick way to see if you store meets Robot Ninja’s minimum requirements

Conclusion
That’s it, your Flatsome-powered WooCommerce site is now connected to Robot Ninja!
With Robot Ninja, you can schedule tests to run at a regular time you choose. What’s great about setting up these automated tests is that they run in the background with you having to log in. If Robot Ninja finds any issues while testing your site, you’ll get an email notification, allowing you to quickly jump in and fix your store without any disruptions for your customers.
We built Robot Ninja to help making running a WooCommerce site as stress-free as possible. With Robot Ninja connected to your site, you’ll never have to worry about whether your checkout has broken because all the testing is taken care of for you.