If you are looking to do more custom or advanced browser testing and really don’t mind getting your hands dirty, just want to learn more about how everything in the browser testing space fits together, then this post is for you.
In this article, I’ll explain the basics of getting up and running with either a Standalone Selenium Server or a complete Selenium Grid using Docker.
But first things first…
What is Docker?
Docker is an open source system that makes it easier to create, deploy and run applications securely using containers. Containers allow developers to package up an application with all the parts it needs, such as libraries and other dependencies, and ship it all out as one package.
These packages, or containerized software, will run on any other machine, regardless of the environment and customized settings. Docker is available for both Linux and Windows-based apps.
What is Selenium?
Selenium is an open source portable software-testing framework for web applications. It allows you to automate testing, using a web browser to perform tasks such as clicking, filling in fields and scrolling.
The core components are Selenium WebDriver and Selenium Server, which can be configured in a Selenium Grid.
Selenium WebDriver makes direct calls to the browser using each browser’s native support for automation. How these direct calls are made and the features they support depend on the browser and browser-specific drivers (ChromeDriver, FirefoxDriver, SafariDriver etc.) that you use. The drivers simply send commands to the browser and retrieve the results.
If your browser and tests will all run on the same machine and your tests only use the WebDriver API, then you likely won’t need to run the Selenium-Server; WebDriver will run the browser directly. For example, if you have Chrome installed locally you can run ChromeDriver locally and connect to it from your localhost. That is by far the easiest option for local development.
If you’re looking to run tests on a separate machine or distribute the tests across multiple machines / virtual machines then you’ll need to use a Selenium Standalone Server or Selenium Grid (to distribute tests across machines).
Why Use Selenium with Docker?
Some of the reasons to use Selenium with Docker include:
- It’s much quicker to get up and running using the pre-made containers than to try and set Selenium up from scratch. You don’t need to install Java #winning.
- You don’t need to install all the necessary browsers. Perhaps you don’t want to install Firefox or want to test with a specific older build of Chrome or one with specific plugin or capabilities?
- Selenium can (and likely will) crash on you. So in my experience, it’s not really something you can simply set and forget. Using containers means you can spin up a new Selenium instance when you need it, discard and then start fresh. Alternatively, if you do plan on leaving it running for extended periods of time, if/when it crashes you can just set to reboot.
- Team members can use the same container regardless of what operating system they use so there are fewer discrepancies between environments.
Installing Docker
The first thing you’ll want to do is install Docker. I’m going to focus on working locally for this article so you’ll likely want either:
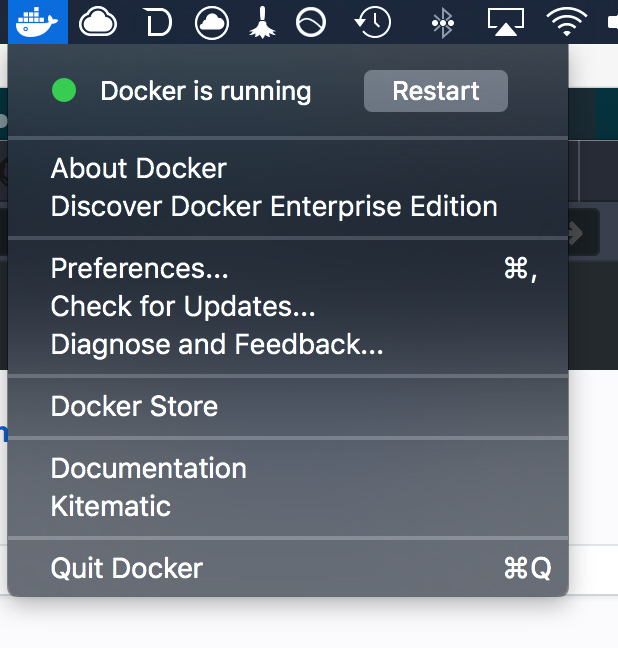
Once installed, you should see the Docker icon running in your Taskbar (Windows) or Menubar (macOS). I’ll be using macOS for this post.
Using Docker with Selenium
Once you’ve got Docker up and running, SeleniumHQ maintains a whole range of Docker images that you can pull down and start using right away.
The list of images is available at Docker Hub or you can browse the project repository on GitHub. The GitHub repository also provides some resources, and you can submit issues if you come across anything.
The images are roughly split into:
- Standalone – Images that create a standalone Selenium server. You’ll only be able to run one of these at a time on your local machine or the port (4444) will conflict.
- Hub – Image that creates a central Selenium server in grid configuration.
- Node – Images that are used in conjunction with the “Hub” image to create a Selenium grid. You can start multiple node containers that connect to your Hub image.
- Base – Images that you can you use to build your own images
Getting a Standalone Server Up and Running
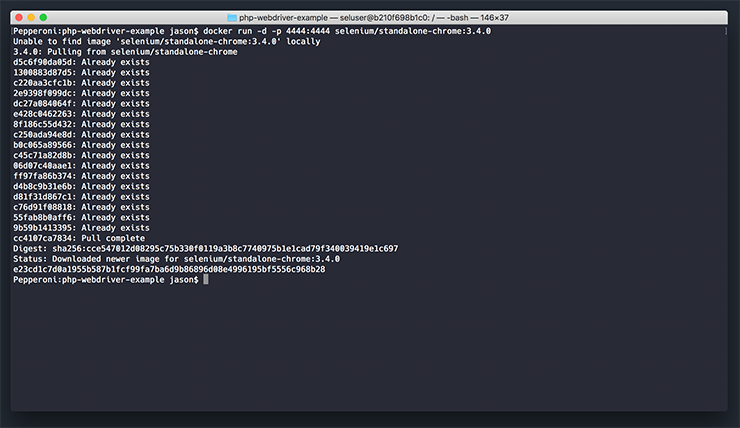
To a get a standalone selenium server working, run the following command in your terminal:
$ docker run -d -p 4444:4444 selenium/standalone-chrome:3.4.0
-druns the container in the background (detached)-p 4444:4444maps the local port 4444 to the port 4444 used by the Selenium Server in the container:latestis tag/version of the image to use
The above will get the latest released image for the Chrome Standalone Server. Alternatively, you can specify a specific version by using the relevant tag. For example:
$ docker run -d -p 4444:4444 selenium/standalone-chrome:3.4.0
To use Firefox, instead use:
$ docker run -d -p 4444:4444 selenium/standalone-firefox:3.4.0
Once you run the command, Docker will download the image and run the container straight away:
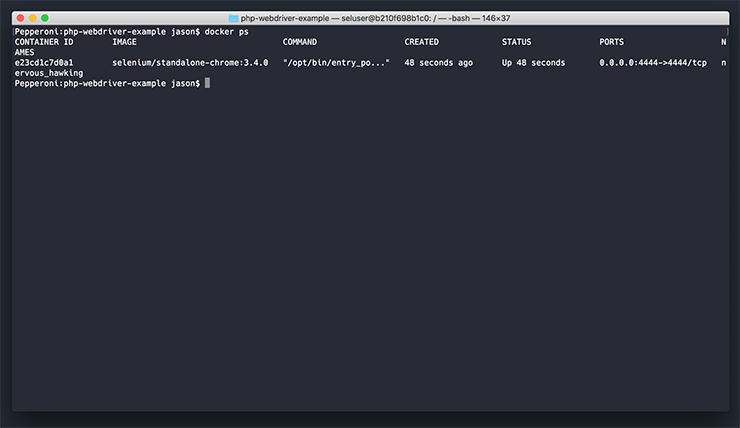
You can then use docker ps to check the container is running:
Note: The GitHub repository offers some additional recommended options for how to run Chrome and Firefox in an optimal configuration in this README.md. For example, when executing docker run for an image with Chrome browser, it’s recommended you add a volume mount -v /dev/shm:/dev/shm to use the host’s shared memory:
$ docker run -d -p 4444:4444 -v /dev/shm:/dev/shm selenium/standalone-chrome:3.4.0
Running a Grid
Setting up a Selenium Grid only requires a few different steps.
To start a small grid with 1 Chrome and 1 Firefox node you can run the following commands:
$ docker run -d -p 4444:4444 --name selenium-hub selenium/hub:3.4.0
$ docker run -d --link selenium-hub:hub selenium/node-chrome:3.4.0
$ docker run -d --link selenium-hub:hub selenium/node-firefox:3.4.0
--nameassigns a specific name, “selenium-hub”, to the Hub container--linklinks one container to another
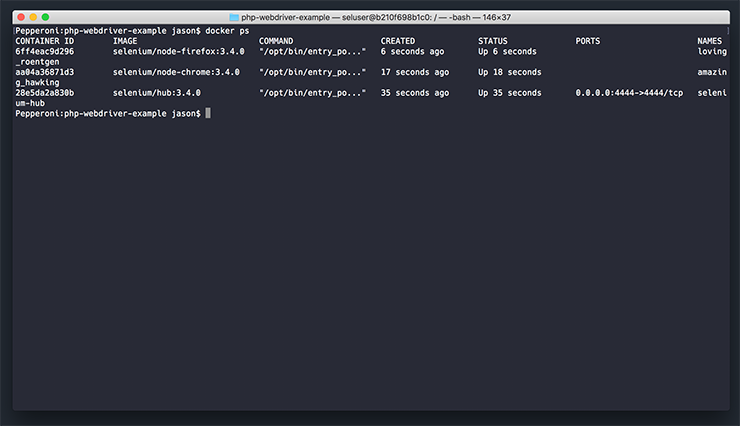
Once you have run the above commands and the images have been downloaded and started, when you run the docker ps command you should see something like this:
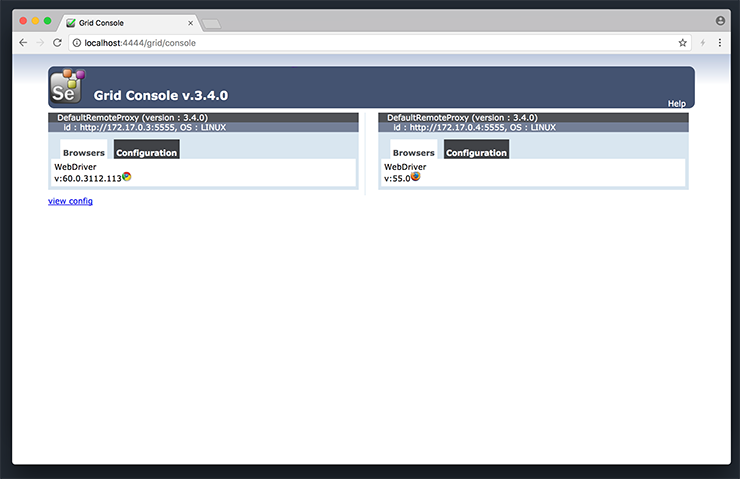
Unlike the standalone server, when Selenium is used in a grid configuration you can access a console that displays the nodes and browsers connected to the grid.
Using your preferred browser, go to http://localhost:4444/grid/console to bring up the console and confirm that you do, in fact, have a grid set up and running with single Chrome and Firefox node.
Of course, if you want to add more nodes to your grid you can simply repeat the commands to add individual nodes as needed. For example:
$ docker run -d --link selenium-hub:hub selenium/node-chrome:3.4.0
$ docker run -d --link selenium-hub:hub selenium/node-chrome:3.4.0
$ docker run -d --link selenium-hub:hub selenium/node-chrome:3.4.0
Note: In a future post I’ll cover how to use Docker Compose and even Docker Swarm for managing your grid.
Testing the Containers Out
Using either the Standalone or Grid containers is as simple as pointing your test code/runner/scripts towards:
If you are familiar with or use php-webdriver, you would simply update your host configuration to point to the above address. For example:
Alternatively, using a tool like Codeception your module configuration would be similarly updated.
Accessing Local Development Sites
If you do plan on using the Docker containers to access local development sites, there are some additional considerations.
If you are using Windows or Linux, you can simply use the --net=host option when running the containers. For example:
$ docker run --net=host selenium/standalone-chrome
On macOS, however, it’s a little trickier due to the way the Docker app itself works (the above option just doesn’t work the same or as expected).
The easiest workarounds I’ve found are:
- Use your local host local network IP address for the URL i.e. http://192.168.1,168. This often isn’t ideal especially if you have a few sites.
- Use the special macOS-only DNS name available in Docker for macOS from 17.03 onward docker.for.mac.localhost, which will resolve to the internal IP address used by the host. Again, this likely won’t be ideal if you have a few sites or just don’t like the address.
- Use the
--add-hostoption to add your local test site to the Docker hosts/containers e.g.--add-host store.localhost:192.168.1.191, which you would use when running the standalone or node containers like so:docker run -d --link selenium-hub:hub --add-host store.localhost:192.168.1.191 selenium/node-firefox:3.4.0. - Configure and use a DNS server. You can use the
--dnsoption to update the Docker containers to use a specific DNS server e.g.docker run -d --dns 54.252.183.4 --link selenium-hub:hub selenium/node-chrome:3.4.0.
Next time…
Hopefully you’ve found my quick introduction useful and have been able to get yourself set up with a working Selenium grid.
In future posts, I’ll build on what we’ve covered in this post and explore how Docker Compose and Docker Swarm mode can be used to set up and maintain larger grid environments. So stay tuned, subscribe to our newsletter and follow us on Twitter and Facebook.
Thanks for the Mac tips, –add-host worked for me. You should just add that you have to enter ifconfig into the terminal to see your current local mac address