We’ve all done it – lived on the edge and clicked “Update” on a live WooCommerce site. It’s an easy thing to do, especially when it’s a relatively small update. Maybe WordPress is telling you there’s an important security minor update or there’s an update for a plugin that you’ve been waiting for.
Whatever the case may be, it’s easy to think, “it’s no big deal, it’s just a quick update, my store will be fine.” But then you click “Update” and your store breaks and the White Screen of Death appears…
Those who updated to WooCommerce 3.3 right after it was released no doubt wished they had tested first on a WooCommerce staging site! The release was rolled back after it broke a bunch of customized stores.
Do I Really Need a WooCommerce Staging Site?
Yes. If you run a WooCommerce store, a staging site is a smart thing to have and, quite frankly, absolutely essential.
A WooCommerce staging site is basically an exact replica of your existing website with two key differences:
- It’s not public-facing, and
- Any changes you make to your staging site have no effect on your live, public-facing website.
Staging sites – aka development environments – allow you to make changes to your WooCommerce store without fear of breaking your live site and impacting sales. The fact is, no matter how skilled the WooCommerce developer community, the open source nature of the platform means it’s still possible that the core software or a third-party plugin will conflict with something sooner or later, whether it’s another extension or your own custom code.
Let’s take a look at staging solutions for WooCommerce.
Note: Don’t forget to back up your site before using any of the methods below!
Creating a Staging Site for WooCommerce
Staging sites allow you to test any changes, plugins, or new features you want to add to your site in a secure development environment before rolling them out to your live site. Developers often use staging sites as a testing ground in order to prevent errors occurring on public-facing website, thus avoiding any issues and/or downtime that might otherwise result.
There are a number of ways you can create a staging site for WooCommerce:
1. Through Your Web Host
Many managed WordPress hosts provide the ability to create staging sites as part of their hosting packages. This is no doubt the easiest and most user-friendly way to get a WooCommerce staging site up and running as it means you don’t have to clone any files or manage your own setup – it’s all taken care of for you.
Here are just a few hosts that provide staging as part of the hosting packages:
2. Use Hosted Staging
If your web host doesn’t offer staging as part of your hosting package, you might want to check out WP Stagecoach, a one-click WordPress staging solution that works with any host.
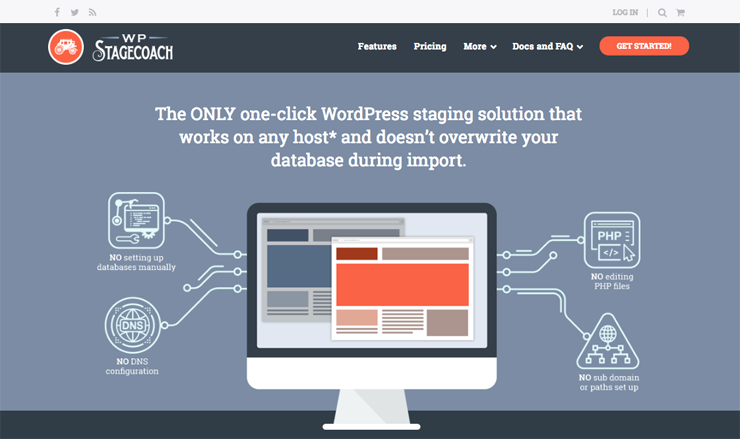
With WP Stagecoach, you can create a copy of your site in one-click. You don’t need to mess around with databases, PHP or DNS – it’s all taken care of. When you’re ready to push your changes to your live site, you can choose which file and database changes you want to import. And if something goes wrong, you can reverse your changes if the import to your live site didn’t go smoothly.
Pros include:
- One-click staging. It doesn’t get better than that.
- It’s extremely easy to set up.
- Rollback functionality.
Cons include:
- The main disadvantage is that your WooCommerce staging site, once set up, is stored externally on WP Stagecoach’s servers. Ideally, you want your staging site to be set up in an environment identical to your live site, so there may be underlying technical differences that can impact the staging site.
- Security is also a concern since your files are hosted on WP Stagecoach’s servers. According to their FAQ: “The servers where the staging sites are hosted is set up so that staging sites are in their own “jail” and cannot access other staging sites.”
For $120 a year (on the Freelancer plan), WP Stagecoach is definitely worth looking into if you want to create a staging site. Even non-technical users should have no problems getting started with WP Stagecoach.
3. Using a Plugin
When it comes to WordPress, there’s a plugin for just about everything, and staging is no exception. There are a few popular migration plugins that are useful for cloning websites, like WP Staging, All-in-One Migration, and Duplicator. But WP Migrate DB Pro and Backup Buddy are must-haves if you want to push and pull databases changes between your WooCommerce staging and live sites.
1. WP Staging

WP Staging is a freemium plugin that allows you to create a staging site accessible from your WordPress admin. Like WP Stagecoach, creating a staging site is easy and only takes a couple of clicks.
Here’s a quick rundown of how to use it:
- Install and activate WP Staging. You can find it in the WordPress plugin repository.
- Go to WP Staging > Sites / Start.
- Choose which database, tables, files and login options you want to include on your staging site. Leave these options unchanged if you want to copy your entire install.
- Click Start Cloning. The plugin will get to work cloning your site and creating your staging site.
- When it’s finished, click Open staging site.
- A new window will open where you can enter your site’s admin details and login to your staging site.
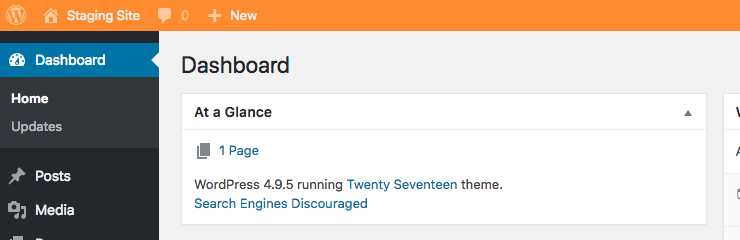
The staging version is created in a sub-directory of your install. When you log in, you’ll see a bright orange banner at the top so you don’t confuse it with your live site.
While the free version lets you clone your site and create a testing version for WooCommerce staging purposes, you’ll need to upgrade to WP Staging Pro for $109 if you want to push changes to your live site.
2. Duplicator

Duplicator is a popular option for cloning WordPress sites. It differs from other migration plugins in that it creates a build of your site, which you can then upload and install wherever you want to host your WooCommerce staging site.
To give you an idea of how it works:
- Install and activate Duplicator. Like the other plugins listed, it’s available to download for free from the WordPress plugin repository.
- Go to Duplicator > Packages and click Create New.
- On the next screen, give your build a name and choose where you would like to store your build (Amazon, Dropbox, Google Drive, FTP etc). You can also enter host and database details if you know where you’re going to upload your build.
- Click Next and once the build has completed, you can download both the installer and your site files (it will be labeled “Archive”).
- You can then upload both files to an empty folder in your site’s directory, or even install it locally.
If you’re looking to clone your site, Duplicator provides a quick way to do it for free.
3. WP Migrate Pro
WP Migrate DB Pro is popular among WordPress developers for good reason – it offers an incredibly easy way to push and pull your databases, find and replace serialized data, and monitor (and even pause and resume) migrations as they happen in real-time.
Here’s how it works: Say you’re developing locally but need the latest data from the live version of your site. With WP Migrate DB Pro installed on both the WooCommerce staging and live versions of your site, you can simply pull the live database down and replace your local database (even if your local database isn’t publicly accessible). Once your changes are ready for your staging site, you can push your local database up and replace your live database.
Here’s a video that demonstrates how it works:
What I love about this plugin is how quick and easy it is to use – it really takes the pain out of migrating WordPress, reducing it to just a few clicks. Before you get started, you’ll need to create a WooCommerce staging site, so you might want to check out one of the cloning plugins above.
While the core WP Migrate DB Pro plugin lets you migrate databases, there are also some handy add-ons so you can push and pull other website files, including media library files and theme and plugin files.
Note: The team behind WP Migrate DB Pro, Delicious Brains, have recently released an Anonymization add-on to ensure the plugin complies with the GDPR. The idea is that you install the plugin on a production site and it then will anonymize all user data whenever the database is exported, pulled by another site, or pushed to another site. This ensures the live data is never migrated to another site with real customer data. You can find the plugin on the WordPress plugin repository and contribute via GitHub.
4. Backup Buddy
BackupBuddy is another great staging plugin thanks to its “deployment” feature, which lets you push and pull the database, media files, plugins, and active theme back and forth between the staging and live versions of your site.
BackupBuddy uses a “BackupBuddy Deployment” remote destination to connect your staging and live sites. For a walkthrough of how the plugin works, check out How to Set Up a WordPress Staging Site with BackupBuddy Deployment.
With BackupBuddy you can:
- See differences in site server settings, active plugins, theme, versions and media before deployment.
- Push and pull changes to the database (all tables, some, or none), plugins, theme and/or media.
- Automatically migrate URLs, paths, and other settings just like manual migrations.
- Watch the deployment progress like a normal backup – the plugin displays a continuous status including a detailed advanced status log of the entire process.
- Undo database changes with one click if something goes wrong prior to confirming the deployment.
- Automatically chunk data transferred between servers to support large files or slow servers.
- Swap databases only after the entire database and all files have been transferred to attempt to minimize site downtime to mere seconds.
4. Create a Staging Site Manually
The last option is to set up a staging site manually. This generally involves:
- Installing WordPress as a sub-domain of your site (that is inaccessible publicly).
- Cloning your entire site, including your site files and database.
- Importing your site files and database to your fresh install.
- Updating URLs and files such as wp-config.php, and restricting access to your staging site.
There are some fantastic resources on how to manually create a WooCommerce staging site, so rather than reinvent the wheel, I’ll point you to some solid tutorials:
- How to Easily Set Up a Staging Site for WordPress on Cheap Shared Hosting – Rachel McCollin, WPMU DEV
- The Step-By-Step Process To Properly Test Your WordPress Website Before Updating It (Workflow, Tools, & Scripts)– Marius Vetrici, Codeable
- How To Setup A WordPress Staging Site (using cPanel) – Ryan Gray, NameHero
- How to Create a Staging Site for WordPress – Maintainn
Configuring and Troubleshooting Your Staging Site
Once your WooCommerce staging site is up and running, you’ll need to log in and configure a number of settings before you can start syncing your staging and live sites.
1. Update permalinks
Go to Settings > Permalinks and check your permalinks structure is up-to-date. Incorrect permalink settings are often the cause of 404 errors on staging sites.
2. Restrict site access
If you’ve set up your staging site in a sub-directory of your site rather than locally, you’ll want to prevent users from accidentally visiting it. To do this, install and activate a plugin like Restricted Site Access. This free plugin lets you limit access to your site to visitors who are logged in or accessing the site from a set of specified IP addresses.
3. Disable SEO
To prevent users from accidentally visiting your WooCommerce staging site, you’ll want to disable indexing by search engines. To do this, go to Settings > Reading and check the box for Discourage search engines from indexing this site.
4. Disable analytics
If you use Google Analytics or analytics plugins to measure your live site’s traffic, you’ll want to deactivate these tools on your staging site. Unfortunately, there’s no way to retroactively remove accidental traffic data sent from your WooCommerce staging site, so this is an important action item to check off.
The easiest way to disable Google Analytics is to remove the tracking snippet or deactivate any plugins you use to enable analytics.
If you’re interested in other ways to ensure your WooCommerce staging views aren’t counted towards your Google Analytics traffic stats, check out Gary Thayer’s post on IP filtering, hostname filtering, and segmenting.
5. Check WooCommerce Subscriptions
If your WooCommerce store uses the WooCommerce Subscriptions plugin, it’s important to know the plugin automatically prevents payments from staging sites. Subscriptions will disable automatic payments and subscription-related emails whenever the current site’s URL differs to the URL of the site where Subscriptions was first activated.
Subscriptions will display a nag on your WooCommerce staging site to let you know it’s disabled automatic payments. You can still test subscription renewals on a test site, but Subscriptions will use the manual renewal process and will not send any subscription-related emails.
6. Disable automated emails
It’s a good idea to disable automated emails on your staging site. After all, you don’t want to inadvertently send emails to customers or users.
There are a couple of simple plugins that can block and then log emails:
- Disable Emails, and
- Email Log.
Disable Emails will stop your WooCommerce staging site from sending any emails using the standard wp_mail() function. No emails will be sent, not even for password resets or admin notifications. Email Log allows you to easily log all your outgoing emails in case you need to view them.
7. Comply with the GDPR
The EU General Data Protection Regulation (GDPR) makes it clear that organizations are accountable for data breaches caused by third-party service providers. This means that if you use a third-party staging hosting service, such as WP Stagecoach, or use a tool like WP Migrate DB Pro to push and pull site from a production site, you need to make sure both you and the tools you are using are GDPR-compliant.
As I mentioned above, Delicious Brains have just released an Anonymization addon for WP Migrate DB Pro to make it GDPR compliant, which is a great step.
But you shouldn’t assume any third-party services or tools you use take security and compliance seriously – it’s on you to protect your users’ data. So audit your staging site as well as your live site and look out for any personal data that might be hiding in plugins, BuddyPress, bbPress, comments or commenting services, and WooCommerce.
Using Robot Ninja on Your Staging Site
Robot Ninja isn’t just for live websites – it works great on staging sites, too.
With Robot Ninja set up on WooCommerce staging, you can test live payments as well as the basic flow of your WooCommerce store in just a few minutes. This is ideal because you can test any changes and make sure your store is in good working order before pushing changes to your live site.
Robot Ninja supports most gateways in testmode/sandbox mode and will use test cards provided by the payment provider.
If you need any assistance using or setting up Robot Ninja on your WooCommerce staging site, get in touch and we’ll help you out.
Conclusion
Updating a live site might not seem like a big deal until a relatively minor change takes down your site and impacts customers. Using a WooCommerce staging site can save you the drama of having to restore a backup, providing you a safe space to test changes first.
The methods above will help you get set up with a staging site in no time, whether it’s in a sub-directory of your site or locally. Check with your web host first to see if they provide staging, as it will be the easiest to set up and use.
Finally, don’t forget to check that Robot Ninja is running smoothly on your live site! If you ever run into any problems or have any questions, feel free to get in touch via email or live chat below.
Great Article! I wanted to add WP Time Capsule (https://wptimecapsule.com) to your list. This is such a breeze working way of backup(incremental), restoring, staging and white labeling. I really recommend looking at this.
Good article. I wonder if you can address the issue of make a staging site live without overwriting new orders.
Thanks!
That would definitely be a useful topic, we’ll add it to our list to look at. Could be tricky, as different hosts/platforms have a lot different ways of tackling it.