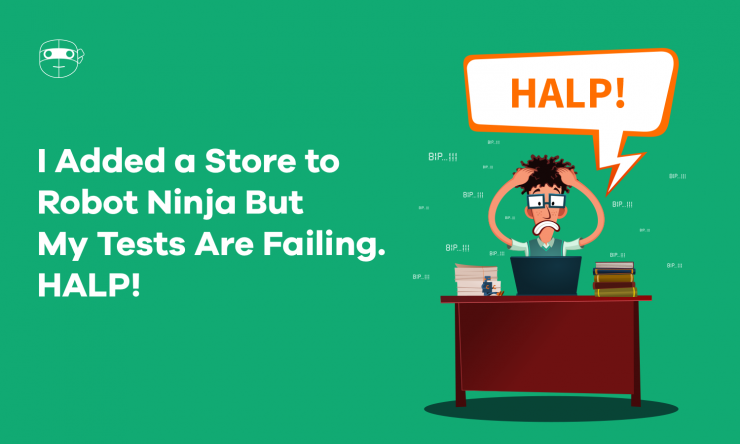
Okay, before you panic, let me reassure you that you’re not alone. When you connect a store to Robot Ninja for the first time, it’s completely normal to fail your initial tests.
Here’s the thing: WooCommerce stores come in all shapes and sizes. Some use the default settings out-of-the-box, while others are so customized you’d never guess they run on WooCommerce.
And that’s what trips up Robot Ninja. When it runs through its usual suite of checkout tests on a store, it looks for the default elements you’d expect for a typical WooCommerce site. But when a store has been customized, whether it’s via code or plugins, and those defaults no longer exist, Robot Ninja scratches its head and fails the test.
This is why we introduced Custom Selectors. With Custom Selectors, store owners can choose and customize what Robot Ninja looks for when testing your store.
Need help with Robot Ninja? Not sure why your tests aren’t working? Get in touch with support! We’re here to help 😄
Your Store (Probably) Isn’t Broken
The most important thing to know is that any early testing hiccups you might experience when setting up Robot Ninja for the first time (at least for the vast majority) are not indicative that your store is broken.
In fact, if you signed up to use Robot Ninja you’ve likely got a working store, otherwise you would probably be off trying to fix things right now rather than sign up for new products/services!
There are four common reasons why Robot Ninja returns failed tests for stores that are in working order:
1. Robot Ninja is looking for the wrong element on your store
When Robot Ninja runs through its tests, it looks for elements using standard WordPress or WooCommerce CSS classes and IDs. But sometimes, themes and plugins – especially custom themes and plugins – don’t use the defaults.
2. Your store uses a plugin or gateway that Robot Ninja doesn’t support (yet)
If your store uses a plugin that, for example, changes the login form to require a PIN instead of a password, or adds a new required field to the checkout, Robot Ninja won’t know to look for these customizations.
3. Your store has a custom checkout flow
There are some beautiful and very highly customized WooCommerce stores out in the world. They provide unique experiences for their customers above and beyond what WooCommerce does out-of-the-box. Robot Ninja just needs to know how to interact with your custom checkout.
4. Card Balance is insufficient to test purchasing a product
By default, Robot Ninja can only test orders up to $9. However, you can top up the test card balance in your account to test orders with a far greater value.
Let’s go through each of these scenarios and their solutions below.
1. Robot Ninja Is Looking for the Wrong Element on Your Store
When Robot Ninja runs through its usual suite of tests on a store, it looks for selectors (CSS classes or IDs and XPath expressions) when attempting to find web page elements it needs to interact with.
By default, it looks for the default classes and IDs used in typical WordPress and WooCommerce themes.
But when Robot Ninja can’t find an element it is expecting, it flags a failure. Failures are commonly due to:
- A legitimate error. For example, a theme or plugin has been updated and your site is now displaying an error, an incorrect template file, or your store is redirecting users to somewhere they shouldn’t be; or
- The element has been changed. Robot Ninja doesn’t know where to find the correct element because it’s been changed or customized.
To help identify the cause of a test failure, Robot Ninja provides some useful information:
- An error message,
- A screenshot of what the page looked like when error occurs, and
- A snapshot of your sites WooCommerce configuration at the time of testing.
All of this information provides clues as to why Robot Ninja couldn’t successfully complete a test.
The error message will usually contain the URL Robot Ninja was attempting to interact with, what action it was attempting to complete, and what element it was attempting to locate/interact with (if relevant).
Let’s look at an example error:
Robot Ninja could not find the add to cart button with class name `single_add_to_cart_button` on product page (https://yourstore.com/product/your-product/).
Using this information, the quickest way to identify whether the element actually exists is to:
- Browse to the page that Robot Ninja failed the test on, usually the direct URL displayed in the error message.
- If the page appears to be in working order, you can relax – this means your store configuration needs to be updated in your Robot Ninja account.
- Open your browser’s DevTools Inspector
- Use the Inspector tool to find the element Robot Ninja had trouble locating, e.g. “single_add_to_cart_button” in the example above.
- If you can’t find the element, it’s safe to assume that Robot Ninja won’t be able to find it either – and couldn’t, hence the error message.
The Solution
To get your tests running smoothly, you can use Custom Selectors to tell Robot Ninja which elements it should be looking for.
A Custom Selector is essentially a Class name, ID, HTML tag name or XPath expression that Robot Ninja can use to distinguish the exact element/s on your web page it should be interacting with when testing your WooCommerce store.
In order to identify the best selector/s Robot Ninja should be using for your store:
- Browse to the page that Robot Ninja failed the test on (usually the URL is in the error message).
- Open your browser’s DevTools Inspector.
- Look for an element that is unique to that page.
- Identify the best selector to use to identify that element.
- Find the relevant selector in your store’s Custom Selector settings and set that to the new selector/element.
If you want to check what selectors we use by default for Robot Ninja’s suite of tests, you can check out:
- The full list on the Custom Selectors settings page in your account, or
- Documentation for each of our default tests.
Armed with this knowledge, if you already know you’re using non-standard selectors in your store, you can go straight to your store’s settings and update the defaults Custom Selectors.
2. Your Store Uses a Plugin or Gateway That Robot Ninja Doesn’t Support (Yet)
If your store uses plugins and/or payment gateways that Robot Ninja doesn’t support, it will trip up your tests.
What does this mean exactly? Well, if you don’t have a supported payment gateway enabled and available on your checkout when Robot Ninja is running through tests, you’ll probably encounter an error such as this:
Robot Ninja could not find any valid payment methods to use for testing. Make sure your store has at least one payment gateway enabled which accepts credit card (we recommend Stripe).
If you use a bunch of different WooCommerce extensions and don’t quite understand what is happening, it is a little trickier.
The Solution
The best approach for fixing this particular issue is to get in touch so we can help you out, either via live chat or email. We can then:
- Double-check the issues you are seeing are, in fact, due to incompatibility – it’s often possible that we can get things working simply by adjusting your custom selectors (see above);
- Confirm if we can support a plugin that’s causing the issue; or
- Discuss whether we can help out further with a custom test flow (see below) as an interim work-around until such a time that we can better support the incompatible plugin.
Before you get in touch with us, check out our full list of supported plugins and gateways here to see if the product your using is or isn’t compatible with Robot Ninja.
You might also want to check out our Ideas and Feedback board to see if we already have an idea to add compatibility for a specific plugin, and you can give it a vote. For example, we have an idea for PayPal support – vote for it if you want it!
3. Your Store Has a Custom Checkout Flow
Robot Ninja’s default test suite follows a very standard WooCommerce checkout flow. However, being the most customizable eCommerce platform in the world means there are a lot of WooCommerce stores that have very non-standard checkout flows.
One of the nicest parts of our work with Robot Ninja is seeing all the new and interesting ways customers have customized their WooCommerce stores to suit their individual needs.
Some examples of the custom checkout flows we’ve come across include:
- Multi-step checkouts across multiple pages
- One-page checkouts where the checkout is on the same page as the product
- After an order has been placed, instead of being redirected to a “thank you” page the customer is redirected to perform some other additional sign-up steps
In each of the above scenarios, it’s possible you’ll get what we affectionately call a “traffic light” display for test results statuses after running your first tests, i.e. a mix of red, green and orange lights.
Or, if you don’t have a traffic light, you might experience an error similar to this:
Robot Ninja has tried to test if the customer was redirected to the Order Received page by looking for the element with class name ‘woocommerce-order-received’ but it could not be found.
The Solution
While we do our best to ensure that Robot Ninja runs through tests smoothly for every possible WooCommerce configuration, as you can see from the above image, highly customized checkout flow throw a spanner in the works.
In this case, sometimes it’s just better if we create a custom flow for you to meet the individual needs of your store. So if you find yourself in this situation, hit the live chat button in the bottom-right corner or get in touch via email and we’ll be happy to chat about how we can customize a checkout flow to meet your store’s needs.
4. Card Balance Is Insufficient to Test Purchasing a Product
Another common reason why initial tests stumble is that the test order total is a greater value than the amount on the test card.
Depending on the gateway and error messages returned to WooCommerce, you’ll see an error message like this:
After completing the checkout and pressing the place order button, Robot Ninja found that no order was created in your store.
Or you might see this:
Robot Ninja was unable to successfully complete the checkout. The following WooCommerce notices were found: <Gateway Specific Notice>. Please contact us support@robotninja.com”
Prior to running tests, Robot Ninja compares test card balances against test product prices and displays a notice, but customers can ignore this notice. Or, sometimes currency conversion and shipping, which is calculated on checkout, can bump the total over the limit.
The Solution
This one’s an easy fix. All you need to do is:
- Increase your test card balance (this amount is refundable),
- Select a cheaper product/s to test with, or
- Create a specific (cheap e.g. $1) test product to test with.
Wrapping Up
When you use Robot Ninja for the first time, it needs to get to know your store and how it works – how it’s different from the default WordPress and WooCommerce defaults, how it’s been customized, and whether you’re using plugins or payment gateways that it knows about.
It’s not unusual that Robot Ninja will come across unfamiliar elements and customizations while testing your store. So you might need to do a bit of tweaking to ensure Robot Ninja knows what to look for when testing your store to get things working smoothly.
We understand it’s not an ideal way to be introduced to the product so we’re also looking at ways we can adjust our onboarding process to make the process smoother.
We’re always here to help! Whether you need help getting started, setting up Custom Selectors or you’re just not sure what’s going wrong, get in touch via live chat (just hit the button in the bottom-right) or send us an email and we’ll be happy to help you get on track.