If you’ve been following along with this series so far, you might be wondering, ”When are these guys going to build their product already?!”
Fair question 🙂
The reality is, developing a product – and giving it every chance of success – takes a lot more than just jumping into code. As I said in part 1, this series doesn’t delve into the technical aspects of how we actually built Robot Ninja. Instead, it explores the process and methodology we used to help us come up with Robot Ninja, our automated checkout testing product for WooCommerce stores.
In part 1 and part 2 of this series, we explored the process we took to help come up with Robot Ninja and also looked at some of tools and techniques we used to help us. Specifically, how we:
- Determined our goals
- Determined our target customer
- Conducted market analysis and research
- Identified underserved customer needs
- Defined our value proposition
In this post, part 3, I’ll build on what’s been covered so far in this series using the output and collateral from the previous two posts and start looking at the solution space. We’ll cover:
- Specifying an MVP feature set
- Creation of the MVP prototype
- Testing the prototype
- Moving on from the prototype into beta and spreading the word
From here on out, we’ll explore some of the more technical aspects of the problems we identified during the earlier research phases of our process and look at how we started thinking about actual solutions.
First Up: What is an MVP?
A Minimum Viable Product, or MVP, is a product or solution constructed with only the most basic features required to solve a problem and start soliciting customer feedback.
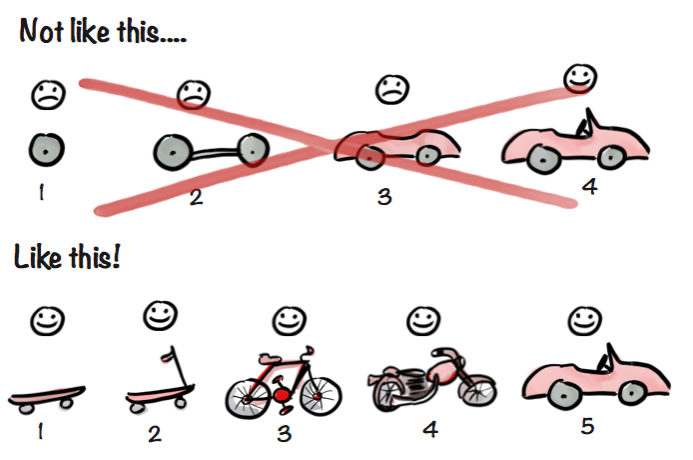
With an MVP, you make a small investment up front by building a smaller solution, and then follow it up with subsequent iterations, each based on measurements and feedback. With an MVP, the idea is that you avoid making a large investment building a grand solution with many features that you might later find go unused.
Step 6: Specifying an MVP Feature Set
Based on all the information we’d gathered so far, we were able to put together an MVP feature set for what would later become Robot Ninja.
We began with a blank spreadsheet and listed all the possible features we’d identified based on:
- Customer feedback – Really listening and taking good notes during each customer discovery interview provided a great foundation to help us to identify features based on direct customer feedback. Some interviewees were quite vocal about specific features they thought would help solve their problems whilst others were not quite sure what they needed but they knew they needed something.
- Competitor features – We looked at existing solutions and what they offered as part of our research phases. Listening to what interviewees had to say about the pros and cons of existing solutions, as well what others had to say around the web, it was fairly easy to get a picture of what features and functionality people actually found useful in existing solutions.
- Our own experience and judgment – Thanks to our existing customer base with WooCommerce Subscriptions, over the years we’ve picked up quite a few ideas around relevant features based on feedback from supporting users and being first-hand witness to happenings in the community that we could potentially address. Also, sometimes you just need to listen to your gut – we didn’t want to discard any ideas or features team members came up with so we added them to the pile.
Next, we mapped each of the potential features in our list against the competition factors we’d earlier identified when defining our value proposition. This was to ensure we had enough features that could contribute towards our proposed strategy. For example:
- Does feature X contribute towards making a cost-effective solution?
- Does feature Z contribute towards making an easy to setup solution?
- Does feature Y contribute towards making a WooCommerce-focused solution?
- Etc.
Any feature that didn’t contribute to, or complement, another potential feature for our proposed strategy was ignored – we decided it was something we didn’t need to focus on (at least until we got more feedback from customers at a later point in time).
User Stories
Next, we used user stories to help us articulate the benefit a particular feature should or could provide, including whom it could benefit (i.e. the target customer), and why the customer would want the benefit. Here are some examples:
As a store owner, I want to be able to easily test my store so that when I update my plugins I don’t have to manually go through and test the checkout myself every single time.
As an agency developer, I want to be able to schedule tests daily for client stores so that I don’t have to continually make time in my schedule to check they are working.
As a store owner, I want to be notified about failed tests via Slack so that my team and I get timely alerts.
Identifying the potential benefits of features in this way helped us to further prioritize and refine our feature set.
Prioritizing Features
Expanding on the spreadsheet we had created, we added columns for “Value” and “Difficulty” and populated each with HIGH | MEDIUM | LOW to help determine a priority for each feature.
- Value – This was determined based on all the information we had gathered, including user stories, feedback, popularity.
- Difficulty – We determined this by investigating the technical aspects of how we could solve the problems. Note that we gave consideration to how much developer time and cost would be involved in implementing the feature.
Comparing the value and difficulty, we were able to get a clearer picture of how much “bang for- our buck” each feature could deliver.
A feature with a LOW difficulty and HIGH value was something we obviously needed to explore sooner rather than later, whilst a feature with a HIGH difficulty and LOW value was something we could wait to implement so we could get more feedback and data first.
Using the above data in our spreadsheet, we were then able to come up with our MVP feature set as well as a rough roadmap of sorts of what features should go into versions 1.0, 2.0 etc.
Steps 7 & 8: Creating an MVP Prototype and Testing With Customers
The goal at this stage was to continue getting feedback from customers and iterating and further refining our solution.
Based on the feature set we’d determined and our objectives as a company, we decided that a Software-as-a-Service (SAAS) approach would be a good place to start with eliciting feedback from customers in relation to the form of the solution we wanted to build.
We began by putting together some mockups for a service/web app that would allow users to test their WooCommerce store.
For this, we used Balsamiq mockups. It’s a rapid wire framing tool that reproduces the experience of sketching on a whiteboard but using a computer. For me, the best thing about Balsamiq is that those providing feedback don’t tend to get caught up on the aesthetics/colors/graphics, plus, you can link mockups together to create a clickable prototype.
We circulated our mockups amongst interested potential customers for their thoughts and feedback. This allowed us to iterate early and get feedback on the SaaS approach we were going for, which proved favorable among those we shared the mockups with, so we stuck with it.
After a little bit of back and forth, we inevitably got to a point where people needed something more tactile and tangible in order to provide us with more valuable feedback. When you start getting feedback like “that looks great, but let me know when you’ve got something for me to actually play with,” you know it’s time to think about moving on.
In a past life, I’d experimented with using tools like paper prototyping, but because we were dealing with individuals from all over the world we decided to simply build an actual prototype web interface to begin demonstrating concepts that we could either send people to or demo in person.
After several months doing research, I must admit we were also chomping at the bit to get experimenting with code.
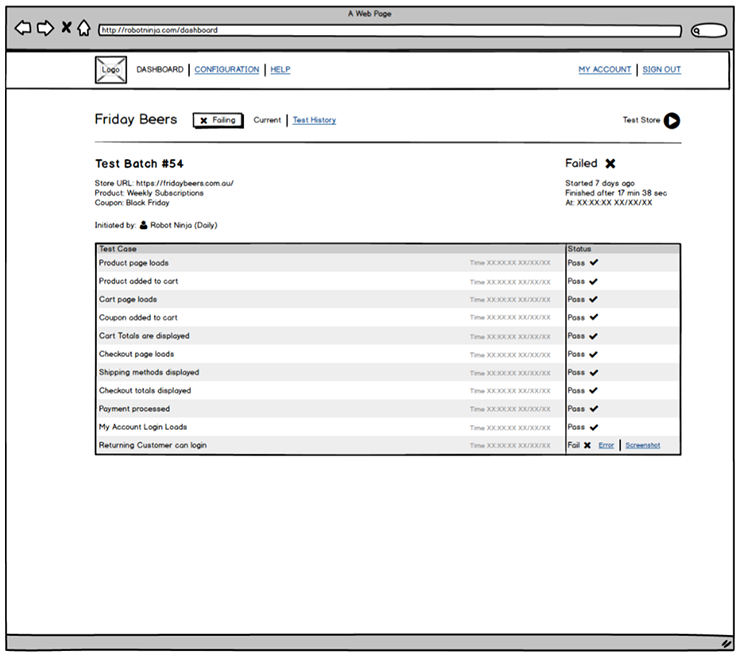
In the two weeks before our Prospress Australian Meetup, Matt and I put together a very basic prototype to present to our team based on our mockups.
We used the tools we knew best – WordPress – and created a basic site that consisted of the very first iteration of the Robot Ninja dashboard. We also began experimenting with the actual “test” code and ended up with a functional interface that could be used to test a site and see the pass/fail results of the tests.
The prototype was very basic. It was hard-coded with little to no configurability but it did a good job of bringing the concept to life.
From that point on, we continued to iterate, get feedback, research and further evolve our solution.
We gave demonstrations to friends, colleagues, strangers – anyone with an interest in testing, basically! – at WordCamps, including WordCamp Auckland and local WordPress and WooCommerce meetups, and talked to other devs at events like Post Status Publish.
M is for Marketing
As the concept began to take shape, well before we’d finished building the product, we began thinking about the marketing and promotional aspects.
Marketing is a crucial element when it comes to developing any new product. Not only does marketing help build brand awareness, but it increases sales and attracts new customers. After all, what’s the point of building something if no one knows about it?
Our goal was to drum up as much interest as possible and start building an email list of potential customers before launching.
Since we’re a team of developers, our strengths lie with code, so we sort help from the experts.
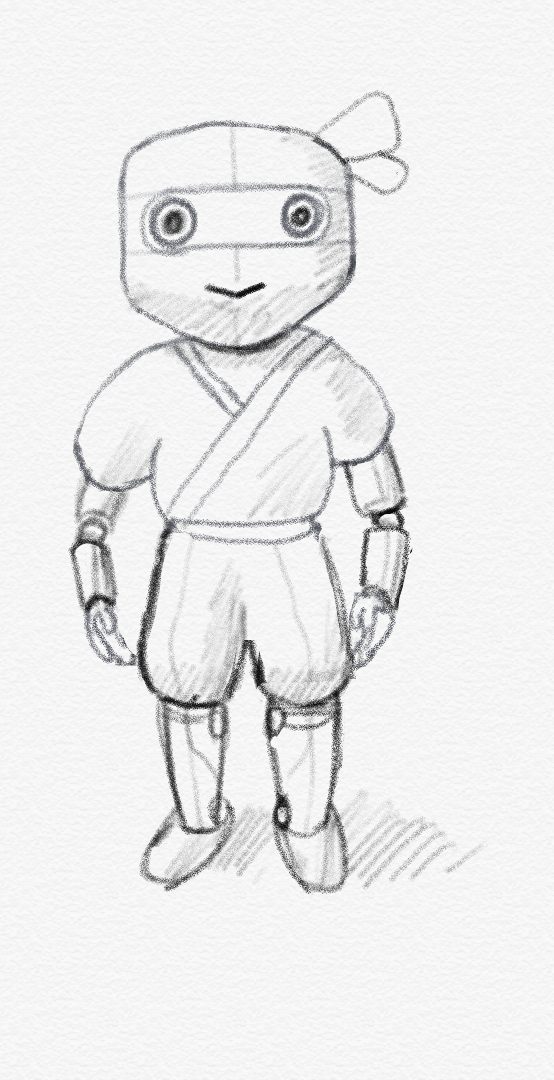
The first thing we worked on was some initial branding materials. For this, we worked with Jon Hicks from Hicks Design. He helped us come up with logo, typography, colors and our mascot Ninja Bot. We think he did an awesome job.
This work fed into our site design, social media and promotional materials such as email templates.
Our first big publicity push was at WordCamp Europe. We were lucky enough to qualify for a small business sponsorship, which gave us a space to demo to conference-goers (and get more user feedback) and allow people to register their interest in Robot Ninja for access to our private beta (helping us to build our marketing email list).
We also asked conference goers to show us their best robot dance in exchange for a hoodie:
A few short months later (they felt very short!), we concluded our beta period and opened Robot Ninja up for anyone to register for free and paid plans.
Not long after, we attended and sponsored WooConf where we had our first booth! For many people this was their first introduction to Robot Ninja so we wanted to make a good impression. Sonja Leix helped us put together an awesome booth setup, which helped us stand out from the crowd. Again, we had hoodies, but this time we gave them out in exchange for an email address.
Now we are fully into the swing of marketing and promotion, working on blog posts like this. Soon we’ll be publishing a fortnightly email newsletter and trying to tame the social media beast. We’ve been working with Rae and Jenni at Words by Birds to help us work out content, publish consistently and at a much higher quality than if we did it ourselves. If you’re a WordPress business that needs help with content marketing, drop them a line.
Bonus: Coming Up With a Name
Where did the name Robot Ninja come from? Coming up with a name for any product isn’t easy. You want to get the right balance of describing the product while at the same time ensuring it’s memorable.
For us, our existing product has the most literal name possible – Subscriptions – so naming this new product provided an opportunity to have some fun.
Testing an online store isn’t the most interesting thing to more people (obviously!) so we thought a fun name could help us cut through the noise where the product itself wouldn’t. We didn’t want something literal like “Test Bot for WooCommerce” or “Autotest for WooCommerce.” Boring.
During our interviews, a lot of people talked about the anxiety they experienced – and even mild trauma – around stores breaking. Our product aimed to remove the stress that comes with testing, and from a brand perspective we thought a playful name could also help ease people’s worries around checkout testing.
And so Robot Ninja was born.
The name is a play on the WooCommerce support mascot Hiro – that’s where the ninja part comes from – and “robot” because it’s an automated testing product.
Wrapping Up
From the outset, our goal was always to focus on solving problems, not solutions, and I’m confident we’ve achieved that with Robot Ninja.
Has all the work paid off? It’s still a little early to tell. I hope so. We’re constantly getting positive feedback and everything is looking promising so far, but I’ll leave that for a recap post at a later point 🙂
If you’re developing your own product or thinking about doing so, here are my key takeaways:
- Focus on the problem space from the very start
- Get feedback and really listen to customers and their problems
- Work on marketing and promotions as early as possible
- Seek help from experts when you need it
We’re still learning. There’s definitely room for improvement and there are more features we want to add to Robot Ninja, but by focusing on customer feedback we’ve been able to concentrate on developing features that provide the most value to our customers, and hopefully the wider WooCommerce community, too.
We’re still very focused on feedback. We have a public ideas board and are always eager to talk to our customers and get their opinions. In fact, a customer just scheduled a call with me for a quick chat early next week.
It’s been a great experience so far and we are very grateful for all the support, help and time people have given us up to this point.
We hope you enjoy using Robot Ninja!